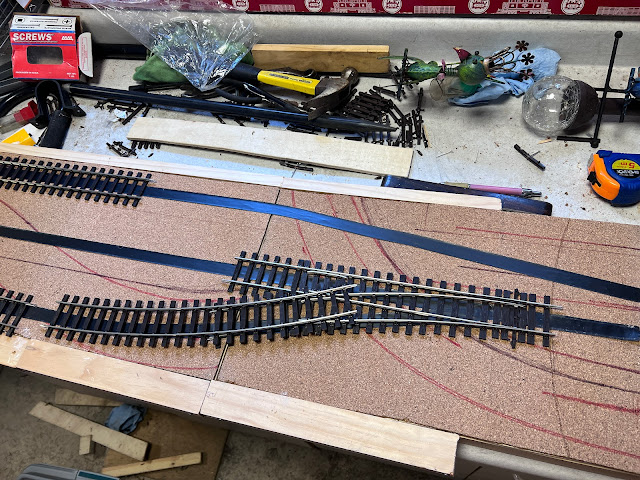
I’m willing to bet there are those of you out there that are doubtful that this layout will ever get built. I don’t blame you. In fact you could still be right. I don’t have a particularly good track record in floating concepts for micro layouts and completing them. Take the Eagle Street concept I was researching, that I outlined in the Spring Issue of The Micro Model Railway Dispatch. I even started a blog for it with my own intentions of building a layout based on it. But a reader of The Dispatch saw the article, and is inspired enough to build their own take on it. As the editor of the magazine, that makes me feel so good. That someone can take my idea and run with it in their own way, It justifies my decision to put out that specialized journal. But now I don’t feel the need to work on my own version. I’m not the greatest layout builder. In fact I have a pretty low opinion of my abilities. So if someone can make a better job than me then great.
With that out of the way. I find myself with a baseboard. Where it came from originally, I don’t know. It was going to be used for my 7/8ths scale Micro from a couple of years ago, according to the markings on the cork tiles that are the baseboard surface. What are the cork tiles covering? Your guess is as good as mine.
The baseboard consists of two sections 3’ (915mm) x 11” (275mm), for a total length of 6’ (1800mm), with a layout area of 4’ (1220mm). Why I made them 11” and not 1’ (305mm) deep instead, is another fact lost to the mists of time. If I knew that perhaps I’d know what the original project was.
Prof. Klyzlr’s original scheme is 12” deep. So I added a strip of 2x1 pine to the rear edge to give it some extra depth. Then I laid out the track to give me an idea of clearances. It was then I realized that I’m still not used to visualizing the volume of American O scale. Things were still not going to fit on there how I wanted them to. Particularly considering my desire to model a slice through a warehouse to act as a view block at the front left. I thought long and hard about this, and decided to fit another batten to the front edge. The layout will be displayed with a proscenium anyway, which will mean all my bad woodworking will be hidden. This takes the total depth to 13” (330mm), and as such over the strict interpretation of the micro layout size guideline. But I’m OK with that. The track work still takes up an area less than four square feet.


Comments
Post a Comment